 Free shipping for all U.S. orders over $100


Last Updated: November 3, 2026
Quick Summary
To troubleshoot pellet stove igniter failure, first clean ash and carbon off the element, then test resistance with the stove unplugged and voltage at the leads during startup. An open resistance reading means the element is dead, while no voltage points to the control board, fuse, or wiring upstream.
- The most common cause of ignition failure is an igniter buried in ash and carbon.
- Testing a pellet stove igniter with a multimeter takes about ten minutes.
- You should see roughly 120V at the igniter leads during a startup cycle.
- Pellet stove igniter replacement takes about 30 to 45 minutes for most homeowners.
- Match a replacement igniter by part number, not by appearance.
Table of Contents
- Common Causes of Pellet Stove Igniter Failure
- How to Test a Pellet Stove Igniter with a Multimeter
- Visual Inspection and Cleaning Before You Replace Parts
- Pellet Stove Not Igniting After Cleaning? Check These First
- Pellet Stove Igniter Lifespan: When Replacement Makes Sense
- Pellet Stove Igniter Replacement: Step-by-Step
- Order the Right Igniter for Your Stove
- Frequently Asked Questions
Common Causes of Pellet Stove Igniter Failure
When a pellet stove won't light, the igniter is the first suspect, but not always the culprit. A pellet stove igniter is a cartridge-style heating element that glows red-hot during startup to light the pellets in the burn pot. When it fails, the stove fills with unburned pellets and shuts down.
Most ignition failures trace back to one of a few causes:
- Carbon and ash buildup coating the igniter element
- A burned-out or cracked heating element
- Loose or corroded wiring connections
You can diagnose most of these yourself with basic tools and a few minutes of observation.
Ash, Soot, and Carbon Buildup on the Igniter
The most common cause of ignition failure is simple: the igniter is buried in ash. Every startup leaves soot and carbon behind, and over time that crust insulates the element, so its heat never reaches the pellets.
Watch for these signs:
- The igniter glows but the pellets never catch
- Startup takes longer than it used to
- You see a hard black crust around the igniter tube
A stiff brush and a shop vacuum handle most of it. Scrape gently around the igniter opening, then vacuum the burn pot and the air holes beneath it.
Wiring, Voltage, and Control-Board Faults
An igniter that gets no power cannot glow, no matter how clean it is. The ignition circuit runs from the control board through a wiring harness to the igniter leads, and any break stops the startup cycle cold.
Check these connections first:
- The spade connectors at the igniter leads (look for corrosion or looseness)
- The harness plug at the control board
- Any inline fuse on the board
A failed control board can also prevent the igniter from firing. If the board shows no startup sequence, no auger feed, or a blank display, the board itself may be the fault.
How to Test a Pellet Stove Igniter with a Multimeter
Testing a pellet stove igniter with a multimeter takes about ten minutes and tells you definitively whether the element is good. Check resistance through the element with the stove unplugged, then voltage at the leads during startup with the stove powered and calling for heat.
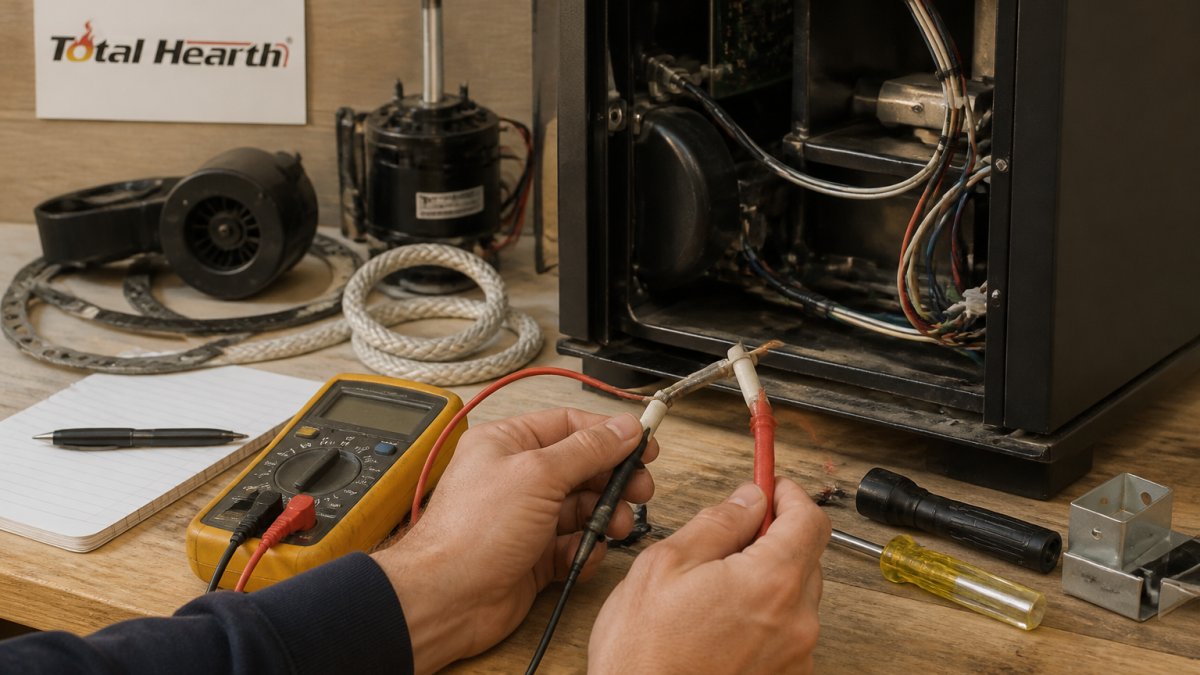
Safety first. Unplug the stove before touching any wiring. Pellet stoves run on 120V house current, and the igniter circuit carries full line voltage. Let the stove cool completely before opening any panel.
Continuity and Resistance Checks
Set your multimeter to the resistance (ohms) setting. Disconnect the igniter leads from the harness and touch one probe to each terminal.
- A reading in the normal range means the element is intact.
- An open reading (OL or infinite) means the element is broken and must be replaced.
- A reading far outside spec points to a failing element even if it still glows.
Resistance specifications vary by model, so check your owner's manual for the exact figure. Treat a reading dramatically higher or lower than spec as a failing element. If you get no continuity, stop here: the igniter is dead and no amount of cleaning will bring it back.
Voltage Test at the Igniter Leads
Reconnect the leads, plug the stove in, and set your meter to AC voltage. Start a normal startup cycle and watch the meter during the first few minutes.
You should see line voltage (roughly 120V) at the igniter leads while the stove is trying to light. If voltage is present but the igniter does not heat, the element is bad.
Reading the Results: What Each Outcome Tells You
Use the meter readings to separate the four common failure patterns before you order a part:
- No glow, no voltage at the leads: the fault is upstream. Check the control board, the inline fuse, and the harness plug before touching the igniter.
- No glow, correct voltage at the leads: the element is open or cracked. Replace the igniter.
- Weak glow, correct voltage: the element is aging or the tube is coated in carbon. Clean the tube and retest; if the glow stays weak, replace the element.
A common pattern is a stove with correct voltage and a glowing element that still will not light because the burn pot air holes are plugged or the exhaust fan is weak. Testing the igniter in isolation prevents replacing a good part while the real fault stays in place. Neglecting these airflow obstructions often mirrors the broader signs of fireplace damage that can compromise the safety and efficiency of any heating system.
Visual Inspection and Cleaning Before You Replace Parts
Pull the igniter and look at it under good light before you order anything. A visual inspection catches problems a meter cannot.
Look for:
- Cracks in the ceramic housing
- A bulging or blistered element
- Heavy carbon crust fused to the tube
If the element looks intact and clean, the fault is probably electrical or airflow-related, not the igniter itself. Clean the igniter tube and the burn pot air openings, then retest. A common mistake is skipping the air holes under the burn pot; if those are plugged, the pellets smother even a working igniter.
Pellet Stove Not Igniting After Cleaning? Check These First
If your pellet stove is not igniting after cleaning, work through the ignition chain in order before replacing the igniter. Cleaning fixes buildup, but not a bad element, a loose wire, a weak blower, or a control board that has stopped sending voltage.
Symptom 1: The Igniter Never Glows
Watch the igniter through the burn pot during the first few minutes of a startup cycle. If it stays dark, the element is getting no power or is open. Test resistance first with the stove unplugged; an open reading means the element is dead. If resistance is in spec, test voltage at the leads during startup. No voltage points upstream to the control board, the inline fuse, or the harness.
Symptom 2: The Igniter Glows Weakly
A dim or patchy glow usually means the element is aging or the tube is coated in carbon. Clean the igniter tube and the burn-pot air openings, then retest. If the glow stays weak with correct voltage at the leads, the element is on its way out and should be replaced before it fails completely.
Symptom 3: The Igniter Glows but the Pellets Do Not Catch
This is the most common false alarm. The igniter is working, but heat is not reaching the fuel or the fire is being starved of air. Check these in order:
- Confirm the auger feeds pellets within the first few minutes of startup.
- Inspect the burn-pot air holes and the air inlet for ash or clinker blockage.
- Check the door gasket for leaks that dilute the air and cool the burn pot.
If the blower is weak or silent, ignition will fail even with a good igniter. The Pellet Stove Blower Motor Replacement Guide helps you check the next likely component.
Symptom 4: The Stove Lights, Then Shuts Down
Ignition followed by a shutdown is rarely an igniter problem. The stove lit, so the element did its job. Look instead at the proof-of-fire sensor, the exhaust fan, the vacuum switch, and the control board's startup sequence. A control board that loses the startup sequence, shows a blank display, or fails to run the auger can mimic an igniter failure.
Ruling Out the Control Board and Sensors
Before you buy an igniter, confirm the stove is actually calling for heat and running its startup sequence. A thermostat that is not calling, a tripped high-limit switch, or a failed vacuum switch can stop the sequence before the igniter ever gets voltage. If the auger does not feed and the exhaust fan does not spin up, the fault is in the sequence, not the element.
Pellet Stove Igniter Lifespan: When Replacement Makes Sense
A pellet stove igniter lifespan depends on use, fuel quality, and how clean the burn pot stays. Igniter life is generally longer when the stove is kept clean. Stoves that run dirty, or use damp or high-ash pellets, wear igniters out faster.
Replace the igniter when:
- It shows no continuity
- It no longer glows during startup despite correct voltage
- The ceramic housing is cracked
If the igniter is fine but the stove still won't light, keep diagnosing. Replacing a good part wastes money and leaves the real fault in place.
Pellet Stove Igniter Replacement: Step-by-Step
Pellet stove igniter replacement is a straightforward job for most homeowners. Set aside about 30 to 45 minutes, unplug the stove, and let it cool fully before you start.
- Kill the power. Unplug the stove and shut off the thermostat call for heat.
- Open the access panel. Remove the side or rear panel to reach the igniter.
- Disconnect the leads. Pull the spade connectors off the old igniter.
- Remove the retaining screw or collar. Most cartridge igniters slide out of a tube held by a set screw or clamp.
- Slide out the old igniter. Twist gently; do not force a stuck element.
- Install the new igniter. Seat it fully in the tube and secure the retainer.
- Reconnect the leads. Match the spade connectors to the terminals.
- Test before closing up. Run a startup cycle and confirm the element glows.
- Reassemble and run a full cycle. Watch for pellets to catch and the flame to establish.
Total time: 30-45 minutes. Difficulty: beginner to intermediate.
Matching the Right Igniter to Your Stove
Compatibility is where most DIY replacements go wrong. Igniters differ in length, diameter, wattage, and connector type, and a part that fits one model may not fit another.
Compare these common cartridge igniters:
| Igniter | Specs | Fits |
|---|---|---|
| USSC 80619 | 4.65" (or 4" upgrade), cartridge | Ashley, King, Vogelzang, Englander, US Stove |
| 80607 / C-E-ING | 4", 3/8", 125V, 250W/300W | US Stove, Breckwell, Ashley, Vogelzang, Hearthstone |
| SRV7000-660 | 4 7/8" cartridge, 300W, 120V | PelPro, Pleasant Hearth, Quadra-Fire |
| Englander PU-CH6 | 7 3/8", 3/8", cartridge | Englander 10-CPM, 25-PUF |
Always confirm the part number in your owner's manual before ordering. If you are upgrading a USSC 80619 from the 4.65" original to the 4" version, you also need Igniter Tube Part #86633.
Order the Right Igniter for Your Stove
The right part ends the guesswork. Before you buy, confirm the part number from your manual, the igniter length and diameter, and the wattage and voltage your stove expects.
At Total Hearth, we stock OEM and OEM-style igniters, including the SRV7000-660 igniter for pellet stoves and the Englander PU-CH6 replacement cartridge. Our team provides expert technical guidance to help you match an igniter to your stove.

Frequently Asked Questions
How do I know if my pellet stove igniter is bad?
Watch the igniter during a cold start. A working pellet stove igniter should glow red-hot within 3 to 5 minutes and light the pellets. If it stays dark, or the stove throws a startup error and the burn pot stays cold, the igniter is suspect. Confirm with a multimeter: unplug the stove, disconnect the igniter leads, and check resistance. An open circuit (no continuity) means the element has failed and needs replacement.
How long should a pellet stove igniter last?
Pellet stove igniter lifespan drops if the stove runs dirty, if ash covers the element, or if the igniter stays on longer than needed because pellets are damp or the feed rate is off.
Can a dirty burn pot cause an igniter to fail?
A dirty burn pot does not burn out the element directly, but it causes the symptoms of failure. Ash and clinkers block the air holes, so pellets do not get enough combustion air and the igniter runs longer each startup. That extra heat cycles the element harder and shortens its life. Clean the burn pot and igniter tube every few weeks during heating season, and clear the air openings before you assume the igniter is dead.
Is it safe to replace a pellet stove igniter myself?
Yes, for most homeowners. The job is a low-voltage parts swap: unplug the stove, let it cool completely, remove the old cartridge, and install the new one with the same mounting. The main safety steps are cutting power at the cord (not just the control board) and checking the new igniter's wattage and voltage match the old part. If wiring is brittle or the control board shows burn marks, call a service technician instead.
A cold stove in the middle of a heating season is a problem you want solved today, not next week. If your diagnosis points to a failed igniter, do not settle for a part that might fit. Get the exact replacement from Total Hearth, where our team helps you confirm compatibility before you order and ships fast so your stove is back to reliable startups. Get started with Total Hearth and order the right igniter for your stove today.
