 Free shipping for all U.S. orders over $100


Table of Contents
- When Your Wood Stove Gasket Needs Replacement
- What You'll Need Before Starting
- How to Measure Wood Stove Gasket Size
- Step-by-Step Gasket Removal and Channel Cleaning
- Installing Your New Door Gasket with Adhesive
- Wood Stove Gasket Cure Time and Safety Precautions
- How to Test Your Wood Stove Door Gasket Seal
- Common Mistakes to Avoid
- Frequently Asked Questions
Last Updated: October 14, 2026
When Your Wood Stove Gasket Needs Replacement
Wood stove gasket replacement is one of the most important maintenance tasks you can tackle.
Most wood stove gaskets last 1 to 8 years, depending on usage and material quality. The key is spotting the warning signs before a complete failure.
Signs your gasket needs replacement:
- Visible cracks or splits in the rope material
- Hardened or brittle texture when you touch it
- Smoke escaping from the door when the stove is running
If your door doesn't seal tightly, cold air flows in and reduces heating efficiency, meaning higher fuel costs. Testing is simple: close the door on a dollar bill.
What You'll Need Before Starting
Gathering the right materials before you begin makes the job faster and cleaner.
Essential materials:
- Replacement rope gasket (correct diameter for your stove model)
- High-temperature gasket cement or adhesive
- Wire brush or stiff-bristled brush
- Putty knife or scraper
Optional but helpful:
- Work gloves for protection
- Safety glasses to shield your eyes from debris
- Drop cloth to catch old gasket material
- Gasket removal tool (some manufacturers provide this)
Total Hearth offers replacement gasket kits for most wood, pellet, and gas stove models. We can help you identify your model and recommend the exact gasket diameter.
Before ordering, measure your current gasket or find your stove's model number to ensure the correct size and profile.
How to Measure Wood Stove Gasket Size
Measuring your wood stove gasket size correctly is critical. The wrong diameter creates gaps that prevent a proper seal, losing efficiency and letting smoke escape.
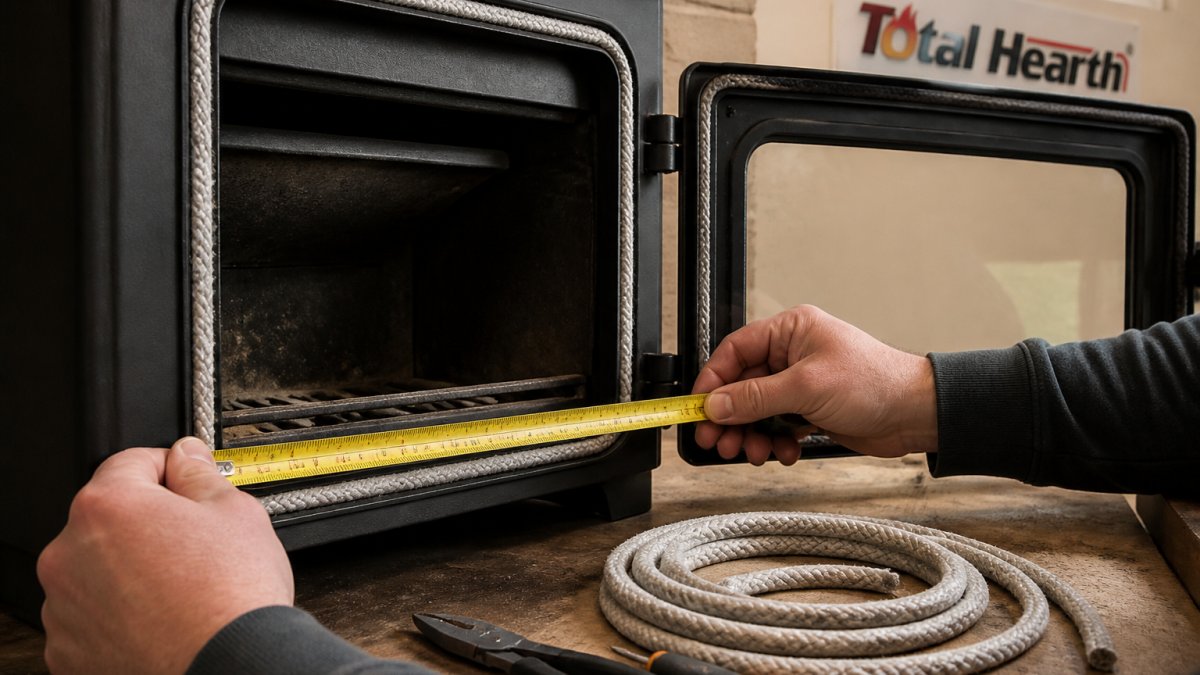
The easiest way to find the right size is your stove's model number.
If you can't find your model number, measure the old gasket. Common diameters are 1/4, 3/8, 1/2, and 5/8 inch.
How to measure gasket length:
- Remove a small section of the old gasket from the channel
- Measure the distance around the entire gasket channel with a tape measure
- Add 1 to 2 inches for overlap when you install the new gasket
- Write down this measurement before you start removal
Some stoves use different diameter gaskets for the door and glass window.
Step-by-Step Gasket Removal and Channel Cleaning
Removal and cleaning takes the most time but determines whether your new gasket seals properly. A dirty channel prevents a tight seal.
Remove the Old Rope Gasket
Open your stove door fully and examine how the gasket sits in the channel. Most rope gaskets are pressed into a groove; some are glued with high-temperature adhesive.
Steps to remove the old gasket:
- Grasp one end of the gasket with your fingers or pliers
- Pull slowly and steadily to free it from the channel
- If the gasket is glued, use a putty knife to gently pry it loose
- Work your way around the entire door frame
- Remove any remaining adhesive residue with your scraper
- Discard the old gasket material
Don't rush. Torn pieces left in the channel will prevent your new seal from working. Pull at a shallow angle and remove the gasket in one long piece if possible.
Clean the Gasket Channel Thoroughly
This is where most people cut corners. Your new gasket won't stick if the channel contains dirt, ash, or old adhesive.
How to clean the channel:
- Use a wire brush to scrub away loose debris and ash
- Wipe the entire channel with a clean, damp cloth
- Let the channel dry completely (at least 15 minutes)
- Inspect for any remaining old adhesive
- Use your putty knife to scrape away stubborn adhesive spots
- Wipe again with a dry cloth
The channel must be completely clean and dry before applying new gasket cement. Moisture or debris trapped underneath creates weak spots where air leaks in.
Installing Your New Door Gasket with Adhesive
Installing the new gasket correctly ensures a tight seal that lasts for years. Apply the right amount of adhesive and press the gasket firmly into the channel.
Installation steps:
- Apply a thin, even bead of high-temperature gasket cement along the entire channel
- Don't use too much adhesive, excess cement squeezes out and makes a mess
- Press the gasket firmly into the channel, starting at one corner
- Work your way around the door frame, maintaining even pressure
- Overlap the gasket ends by 1 to 2 inches where they meet
- Trim the excess gasket with a utility knife for a clean finish
- Wipe away any excess cement with a damp cloth
Use only high-temperature gasket cement rated for wood stoves. Regular silicone caulk fails within months.
Press the gasket into the channel with firm, consistent pressure. The better you seat it now, the better your seal will be.
Wood Stove Gasket Cure Time and Safety Precautions
Curing is the step most homeowners rush, and it determines whether the repair lasts a season or a month.
Read the product label, not a generic rule. Cure times are product-specific: many cements specify 24 hours of air cure, some add a staged break-in (small, medium, then full fire), and a few solvent-based cements call for 48 hours.
Do not confuse "dry to the touch" with "cured." Cement can feel firm within an hour and still be uncured underneath.
Cold-stove and work-area safety:
- Let the stove cool completely. "Warm to the touch" is not cold; a stove burning this morning can hold heat for hours.
- Confirm the fire is out and ash is cold before scraping. Cold ash can hide live coals.
- Work in a ventilated area. Cements and removers off-gas solvent, so open windows and run a fan moving air out of the room.
- Wear work gloves and safety glasses. Old gasket rope is brittle, and wire-brushing throws ash and metal bristles.
Disposal and cleanup:
- Old rope gasket and scraped adhesive go in the trash, not the wood stove. Do not burn old gasket material; it may release fumes.
- Wipe up cement residue before it sets; once cured, it is difficult to remove from painted surfaces and glass.
- Wash your hands after handling cement, and store the tube per the label.
How to Test Your Wood Stove Door Gasket Seal
A single dollar bill test is a starting point, not a verdict.
Check 1: The dollar bill (or paper strip) test, done properly.
- Close and latch the door the way you normally would.
- Insert a dollar bill (or a strip of paper) at a point along the gasket and close the door on it.
- Pull the bill out with steady, even pressure.
- It should require noticeable resistance and should not slide out freely.
- Repeat at roughly eight points: each corner, the middle of each side, and the top and bottom center.
A bill that pulls out easily anywhere marks a leak at that spot.
Check 3: The flashlight test. On a dark evening, place a bright flashlight inside the firebox, close the door, and look for light escaping around the perimeter.
Check 4: The paper-feel test for tightness. Close the door on a strip of paper and slide it sideways along the gasket.
Troubleshooting what the tests tell you:
- Gasket is loose or lifting out of the channel. The cement didn't bond, usually because the channel wasn't fully clean and dry or too little cement was used. Let the stove cool, pull the gasket back, clean and re-cement. Don't add cement on top of a loose gasket.
- Gasket is too tight and the door is hard to latch. The gasket may be too large or seated too high. Confirm the diameter against your stove's spec; if correct, press the gasket deeper. If it still won't latch, the hinges or latch may need adjustment.
- Gasket is uneven around the perimeter. Usually the gasket was stretched or compressed during installation. Work around the door again, pressing evenly, and re-check with the paper-feel test.
- The whole door still leaks. Check door alignment and the hinge side; a sagged door won't seal no matter how good the gasket is. Also confirm you replaced the correct gasket, since some stoves use a different profile on the door than on the glass.
Run the bill test, the smoke test, and the flashlight test together. If all three pass, the seal is good. If any one fails, use the troubleshooting list to find the cause before you light another fire.
Common Mistakes to Avoid
Learning what not to do prevents wasted time and failed repairs.
The biggest mistakes:
- Skipping the channel cleaning. Dirt and old adhesive prevent proper sealing.
- Using the wrong gasket size. Too small or too large creates gaps. Measure carefully or use your model number.
- Applying too much adhesive. Excess cement squeezes out and wastes material. Use a thin, even bead.
- Not pressing the gasket firmly enough. Laying it loosely means weak adhesion. Press firmly as you work.
Frequently Asked Questions
How do I know when my wood stove gasket needs replacing?
A worn wood stove gasket fails to seal the door properly, causing air leaks that reduce stove efficiency and allow cold drafts into your home. Signs include visible gaps between the door and frame, ash escaping around the door, difficulty closing the door, or the stove burning through fuel faster than normal. You may also notice the door no longer sits flush against the frame. If you suspect a problem, perform a visual inspection and test the seal with a piece of paper (see seal test section below).
What adhesive should I use for a wood stove gasket?
Use high-temperature gasket cement rated for stove temperatures of at least 500°F. Gasket cement specifically formulated for wood-burning stoves ensures a permanent, heat-resistant bond that won't fail under combustion heat. Apply a thin, even bead along the gasket channel before pressing the new rope gasket into place. Follow the manufacturer's instructions for application thickness and curing time, as these vary by product. Never use standard construction adhesive or silicone caulk, which will fail at high temperatures.
How long should wood stove gasket cement cure before I use my stove?
Most wood stove gasket cements require 24 hours of curing time before the stove is safe to operate. During this period, keep the door closed but do not light a fire. Check the specific product instructions, as some formulations may require longer cure times in cold or humid conditions. Lighting the stove before the adhesive fully cures will compromise the seal and may damage the gasket. Mark your calendar or set a reminder to ensure you don't accidentally use the stove too soon.
How can I test whether my new stove gasket seals properly?
After the gasket cement has cured completely, perform a paper test to verify the seal. Close the stove door on a piece of standard paper so that half extends outside. Try to pull the paper out gently. If the gasket seals correctly, the door will grip the paper firmly and you'll feel significant resistance. If the paper slides out easily or the door won't hold it, the gasket is not sealing properly and you need to check for gaps, uneven installation, or insufficient adhesive. Repeat the test around the entire perimeter of the door.
Replacing your wood stove gasket yourself saves money and keeps your heating system running efficiently. The process takes just a few hours and requires only basic tools. At Total Hearth, we provide replacement gasket kits with the correct materials for your specific stove model, plus expert guidance if you have questions. Get the exact gasket size you need and enjoy a tight seal that lasts for years.