 Free shipping for all U.S. orders over $100


Table of Contents
- What You'll Need Before You Start
- Step 1: Remove the Stove Door and Old Glass
- Measuring Stove Glass for Replacement: Getting the Exact Fit
- Step 2: Install the New Stove Door Glass
- Stove Door Gasket Replacement: Sealing the Door Properly
- Safety and Disposal: Handling Shattered Glass and Old Panels
- Conclusion
- Frequently Asked Questions
Last Updated: October 2, 2026
What You'll Need Before You Start
Nearly 400 complaints about potentially defective oven door glass landed with the Consumer Product Safety Commission between January 2025 and March 2026, according to Consumer Reports' investigation into shattering oven door glass. That's a lot of shattered glass, and a lot of homeowners staring at a broken stove door wondering what to do next. Learning how to install stove door glass yourself is one of the most useful repairs you can master, and this guide from Total Hearth walks through every step. Most replacements take 30 minutes or less once you have the right glass on hand. Below, we'll show you exactly how to remove the old panel, measure for a new one, and seal everything back up.
Here's what to gather before you touch the door:
- Protective gloves and safety goggles (glass shards hide in corners)
- Phillips head screwdriver and a flathead screwdriver
- A Torx 15 driver and a 1/4" nut driver for most range models (AppliancePartsPros tool guide for part WB56T10187)
- A padded surface like a towel or foam mat
- A shop vacuum for glass fragments
- Replacement stove door glass cut to your exact model specs
- High-temp stove door glass adhesive or gasket cement rated for your appliance
Step 1: Remove the Stove Door and Old Glass
Start by killing the power or gas supply, then let the appliance cool completely. A warm door flexes, and flexing glass cracks. This step is where most people rush, and it's where most damage happens.

Detaching the Door from Hinges
Open the door fully and locate the hinge locking mechanism on each side.
If the door feels stuck, do not force it. Check that both hinge locks are fully engaged; a partially locked hinge will bind and can bend the hinge arm.
[EMBED: Our own YouTube video showing hinge lock release and door lift-off | section:Step 1: Remove the Stove Door and Old Glass]
Disassembling the Door Frame and Removing Glass Panels
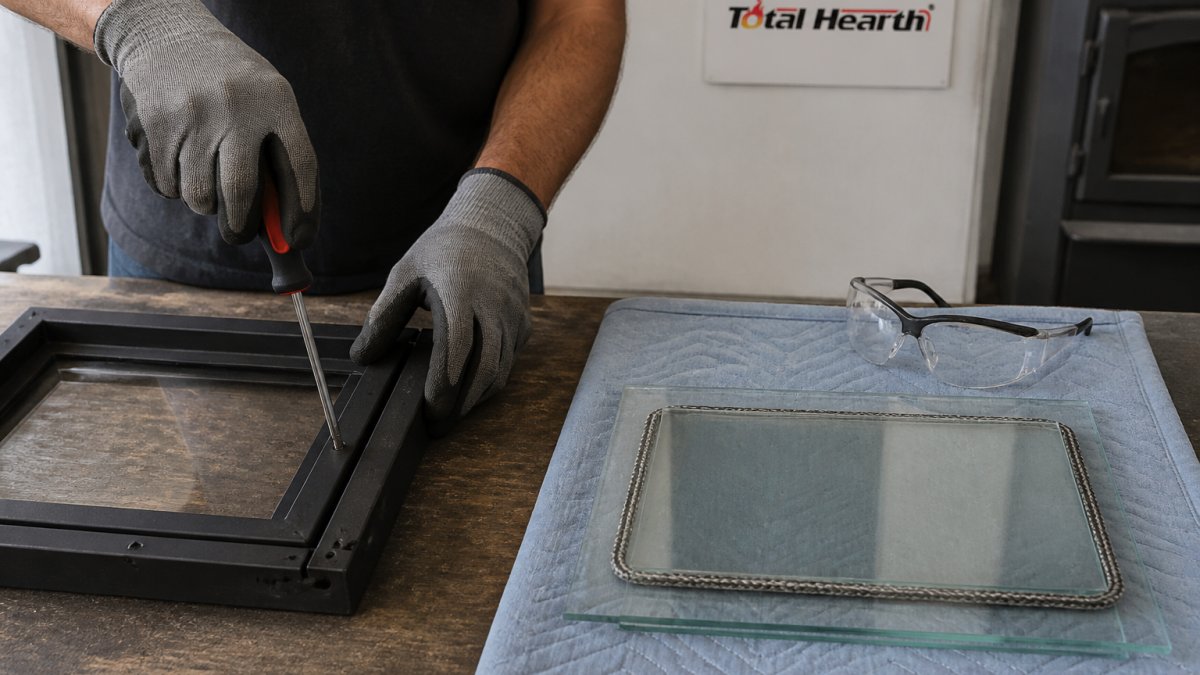
Remove the door handle first, then take out the door frame screws along the top trim and sides. Most doors use 6 to 10 screws, often a mix of Phillips and Torx 15.
Pull out the broken tempered glass carefully. Wear gloves and goggles; tempered glass breaks into small dice-like chunks that can fly. Then vacuum every glass shard from the frame cavity.
Inspecting the Frame and Hinge Arms
With the glass out, inspect the frame for warping, rust, or bent hinge arms. A warped frame will not seat new glass evenly and will crack it. Check the hinge arms for side-to-side play; if a hinge arm wobbles, the door will sag after reassembly and stress the glass. Most hinge arms can be tightened with a 1/4" nut driver.
Documenting Panel Order and Spacer Placement
Before you remove the inner glass sheet, note how the spacers are positioned. Spacers are small metal or ceramic clips that hold the glass panels apart and allow for expansion. They usually sit at the corners or along the sides. If you lose a spacer, the glass can shift and crack. Take a photo of the spacer layout, then remove the inner glass sheet and set it aside.
Measuring Stove Glass for Replacement: Getting the Exact Fit
Measuring stove glass for replacement comes down to three numbers: width, height, and thickness. Measure the old panel if it's intact. If it shattered, measure the frame opening instead and subtract 1/8" on each side for expansion room.
Order by your stove's model number when possible. For older or obsolete models, custom-cut glass is the reliable route. Total Hearth cuts ceramic, tempered, and mica glass to your exact specifications, so you're not gambling on a part number that may have changed since your stove was built.
Check these before ordering:
- Width and height to the nearest 1/16"
- Glass thickness (usually 3/16" or 1/4" on wood stoves)
- Glass type: tempered glass for oven doors, ceramic for high-heat wood stoves
- Corner shape (square vs. rounded)
Step 2: Install the New Stove Door Glass
Lay the new panel into the cleaned frame and check the fit before applying any adhesive. It should sit flat with even gaps on all sides. If it rocks or binds, stop and re-measure. A panel that rocks will crack once the door heats.
Applying Stove Door Glass Adhesive and Seating the Glass
Run a thin bead of stove door glass adhesive or high-temp gasket cement around the frame channel. Imperial KK0076 Gasket Cement handles up to 2,000°F and bonds fiberglass gasket, metal, and masonry surfaces.
Gasket Cement (Black) – 10.3 oz Caulking Tube | KK0076 | High-Temp Adhesive →
Most high-temp gasket cements need a short air cure before you close the door. Check the tube for the manufacturer's cure time; a common pattern is 20 to 30 minutes of air drying before the door is closed.
Post-Installation Calibration: Checking Door Tension and Hinge Alignment
After the door is back on its hinges, close it slowly and watch the gap between the door and the stove body. The gap should be even from top to bottom and side to side.
Check the door tension by opening and closing it a few times. The door should close with light resistance and latch firmly without a hard slam.
Testing the Door Alignment and Seal
With the door closed, run a piece of paper around the door perimeter. If the paper pulls out easily at any point, the gasket is not sealing there. Adjust the hinge or replace the gasket. A proper seal keeps heat in the oven and prevents the glass from overheating unevenly.
[EMBED: Our own YouTube video showing door alignment and paper test after glass replacement | section:Step 2: Install the New Stove Door Glass]
Stove Door Gasket Replacement: Sealing the Door Properly
Stove door gasket replacement is the step most guides skip, and it's the one that decides whether your stove burns efficiently afterward. Once the door is apart, the old gasket seal is right there. Replace it.
Pull the worn gasket out of its channel and scrape the groove clean. Run a bead of gasket cement, then press in new rope gasket sized to your door: 1/4", 3/8", or 5/8" depending on the channel width. Sold by the foot, so you order exactly what you need. Let it air-dry before closing the door.

Gasket Size |
Best For |
Typical Door Type |
|---|---|---|
1/4" rope |
Small wood stoves, inserts |
Narrow channel doors |
3/8" rope |
Standard wood stoves |
Most cast iron doors |
5/8" rope |
Large stoves, furnaces |
Wide channel doors |
Safety and Disposal: Handling Shattered Glass and Old Panels
Shattered glass goes in a cardboard box, taped shut, labeled "broken glass," and placed beside your trash bin, never loose in the bag. Wrap large panels in newspaper and tape the bundle. Check with your local waste department, since some areas require separate drop-off for tempered glass.
For the safety side:
- Wear protective gloves and safety goggles through the whole job
- Vacuum, don't sweep, to catch fine fragments
- Wipe the floor with a damp paper towel after vacuuming
- Keep kids and pets out of the work area until cleanup is done
The thermal shock that cracks these panels usually comes from sudden temperature swings, so let your stove heat and cool gradually after the repair. Consumer Reports advises documenting any shatter with photos and repair records, then filing a report with the CPSC (Consumer Reports guidance on reporting oven glass failures).
Conclusion
A cracked stove door doesn't have to mean a service call. With the right glass, the right adhesive, and about 20 minutes, you can handle this repair yourself. Total Hearth cuts ceramic, tempered, and mica glass to your exact model specs, stocks gasket cement and rope gasket in every common size, and backs it all with technical guidance if you get stuck.
Frequently Asked Questions
Can I use my stove if the inner glass is broken?
No. Operating a stove with cracked or broken glass is unsafe. The glass can shatter completely during use, and the door loses its ability to contain heat and gases. If the inner pane is damaged, stop using the stove immediately and replace the glass before lighting another fire. A compromised door also allows air leaks that reduce efficiency and can cause creosote buildup.
What tools are required to install new stove door glass?
You will need a Phillips head screwdriver, a flathead screwdriver, and a 1/4-inch nut driver or socket set. For some models, a Torx 15 driver is also necessary. Have protective gloves, safety goggles, and a padded surface ready. A vacuum with a brush attachment helps clean up glass shards. If you are replacing the gasket, add gasket cement and a new rope gasket to your list.
How do I measure my stove door for a custom glass replacement?
Remove the old glass and measure its exact width and height in inches, including any curves or cutouts. Measure the thickness as well. If the old glass is shattered, measure the opening in the door frame where the glass sits. Order custom-cut glass to those specifications. Total Hearth offers custom-cut ceramic, tempered, and mica glass tailored to your exact measurements. Have questions? Please contact us before placing your order.
What is the difference between ceramic and tempered stove glass?
Ceramic glass is designed for high-heat applications (up to 1400°F) and resists thermal shock, making it ideal for wood, pellet, and gas stoves. Tempered glass is stronger than regular glass but can shatter if exposed to rapid temperature changes. For stove doors, ceramic glass is the standard choice. Total Hearth provides both types, custom-cut to fit your appliance.