 Free shipping for all U.S. orders over $100


Quick Summary
A leaking wood stove door is usually fixed by checking the rope gasket, latch, and door flatness with a paper-strip test on a cold stove. If the gasket is flat, brittle, or torn, replace it with high-temperature fiberglass rope sized to the manufacturer's specification.
- Do the paper-strip test on a fully cold stove, around the whole door perimeter.
- Uneven paper resistance points to the latch or hinges, so adjust those before buying a gasket.
- Use high-temperature fiberglass rope; cotton, felt, and hardware-store weatherstripping fail quickly.
- Match the gasket to the manufacturer's specification, or measure the channel rather than the old rope.
- A warped door will not seal even with a new gasket, so check flatness with a straightedge.
Table of Contents
- Why Your Wood Stove Door Is Leaking Air
- How to Test a Wood Stove Door Seal With a Paper Strip
- Safety Checks Before You Touch the Stove
- Wood Stove Door Gasket Replacement, Step by Step
- Choosing the Right Wood Stove Gasket Rope Size
- Adjusting the Wood Stove Door Latch to Close the Gap
- Testing Your Repair and Running a First Controlled Fire
- Frequently Asked Questions
Why Your Wood Stove Door Is Leaking Air
A wood stove door that leaks air can affect how the stove burns. Possible causes include a worn door gasket, a loose latch, or a warped door.
Air leaks can happen when the rope gasket around the door gets flat, brittle, or torn.
Watch for these common signs:
- Fires that burn too fast, even with the air control closed
- A smoky smell or smoke around the door edge
- Gray or white ash patterns on the glass or door frame
- Visible daylight or a cool draft near the edges of the door
- A rope gasket that is flat, cracked, or missing in spots
These symptoms can also come from a warped door or a bad latch, so the next step is to test the seal before you order parts.
How to Test a Wood Stove Door Seal With a Paper Strip
A paper-strip test can help check the door gasket. Do it on a fully cold stove, and test the whole door perimeter.
What you need
- A dollar bill or a strip of ordinary printer paper about 1 inch wide and 6 inches long
- A flashlight
- A marker or a piece of tape to flag bad spots
- Heavy gloves if the door edge is sharp
The test, step by step
- Open the door and look at the rope gasket. Note any flat, shiny, compressed, or missing sections before you test.
- Close the door on the paper strip so the strip is pinched between the gasket and the stove face.
- Pull the paper straight out with light, steady tension. The paper's resistance can help you assess the seal.
- Move the strip a few inches and repeat. Test at the top, bottom, hinge side, and latch side, plus each corner.
- Mark every point where the paper pulls out freely.
- Repeat the test with the door latched normally, not pushed shut by hand. The latch has to be doing the work.
Reading the results
Use the pattern, not just the presence of a leak, to pick the repair:
- Free pull all the way around: the gasket is compressed or the wrong diameter. Go to gasket replacement.
- Free pull on one side only, tight on the other: the door is cocked in the frame or a hinge is worn. Adjust the latch and hinges before buying a gasket.
- Free pull at the corners but tight in the middle of each side: the gasket is stretched or was installed too long. Replacement is usually the fix.
- Tight everywhere but smoke still escapes: the leak is probably the glass gasket, the door frame-to-stove-body gasket, or a cracked door casting. Check the glass seal and the door frame next.
- One small free spot with a visible gap: look for a warped door edge or a chunk of missing gasket before ordering parts.
The cold-stove decision tree
Work through these checks:
- Gasket condition: flat, brittle, torn, or missing rope means replace the gasket.
- Paper-strip pattern: uneven resistance means check the latch and hinges before the gasket.
- Door flatness: lay a straightedge across the door face and look for daylight under it. A warped door will not seal even with a new gasket.
- Glass seal: inspect the rope or tape around the glass. A failed glass gasket leaks air just like a door gasket and is often mistaken for one.
- Latch and strike: close the door and watch whether the latch pulls the door evenly against the frame. A worn latch or strike plate lets the door sit crooked.
- Door frame gasket: some stoves seal the door frame to the stove body with a second gasket. If the door gasket tests tight, check that joint.
Safety Checks Before You Touch the Stove
Always work on a stove that is completely cold. Hot glass, hot metal, and leftover ash can cause burns or start a fire. Check that the ash pan and firebox have no glowing embers before you start.
Before you begin, check these safety points:
- Confirm the stove and firebox are cold to the touch
- Wear heavy gloves and eye protection when scraping old gasket material
- Keep the room ventilated, since old adhesive fumes can be strong
- Do not use the stove if you find cracked glass, a warped door, or heavy rust
If the glass is cracked or the door is bent, stop. Repair or replacement is safer than running the stove with a damaged door. Check your owner's manual for the exact gasket type and any safety warnings from the manufacturer.
Wood Stove Door Gasket Replacement, Step by Step
Replacing the gasket is one possible fix for a leaking door.
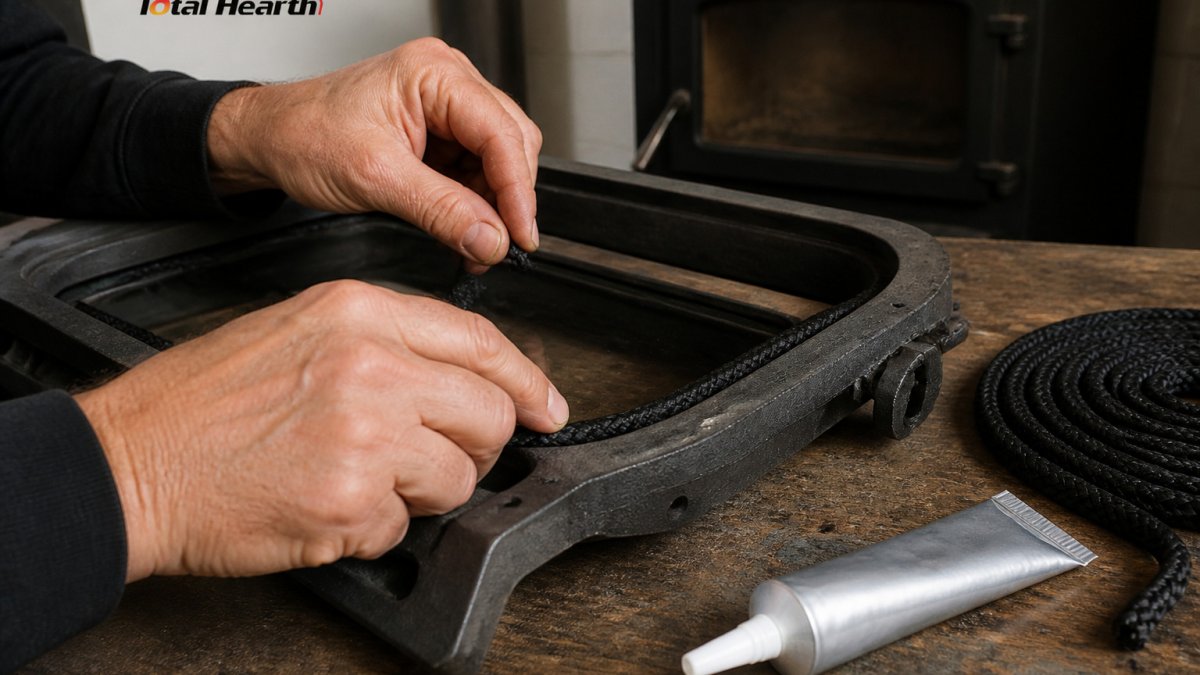
The 1/4" High-Temperature Rope Gasket | By the Foot from Total Hearth is sold by the foot. It is made from black textured fiberglass and measures 1/4" wide by 1/4" thick.

Choosing the Right Wood Stove Gasket Rope Size
The right gasket size depends on the stove manufacturer's specification for your model.
Start with the manufacturer's specification
Before you measure anything, check the owner's manual or the rating plate on the back of the stove for the gasket part number or the specified rope diameter. Most manufacturers list the door gasket size and sometimes the length. If the manual is gone, search the model number and "door gasket" to find the specification. Buying to the manufacturer's number is the single best way to avoid a repeat leak.
Measure the channel, not the old rope
Old rope is compressed and unreliable as a size reference. Measure the channel instead:
- Remove the old gasket and scrape the channel clean.
- Measure the channel width and depth with a ruler or calipers at several points around the door.
- Match the rope diameter to the channel depth. The rope should fill the channel and stand slightly proud so the door compresses it when latched.
- Measure the channel length around the perimeter and add a small allowance, typically 1 to 2 inches, so the ends meet without stretching.
Understand rope diameter and profile
Total Hearth offers high-temperature rope gaskets in 1/4 inch, 3/8 inch, 5/8 inch, and 3/4 inch sizes. The listed products are made from black textured fiberglass.
Match the material to the application
Wood stove door gaskets are almost always fiberglass rope rated for high temperature. Do not substitute cotton, felt, or hardware-store weatherstripping. Those materials char, compress, and fail quickly, and some release smoke or odor. Use a gasket cement or adhesive rated for the temperature the door sees, and follow the label for cure time.
Sizing table
| Rope Diameter | Typical Use | Common Channel Fit |
|---|---|---|
| 1/4 inch | Small doors and glass seals | Shallow, narrow channel |
| 3/8 inch | Most standard wood stove doors | Standard door channel |
| 5/8 inch | Larger doors and deeper channels | Deep channel |
| 3/4 inch | Heavy doors and large fireboxes | Wide, deep channel |
When to stop and ask
Once you have the correct diameter, profile, and length, install it with high-temperature cement, let it cure fully, and rerun the paper-strip test before the first fire.
Adjusting the Wood Stove Door Latch to Close the Gap
A new gasket won't seal if the latch pulls the door unevenly. Check the latch after the gasket is in place.
- Close the door with the latch engaged and look for gaps along the edge.
- Loosen the latch screws slightly.
- Adjust the latch so it pulls the door evenly against the frame.
- Tighten the screws and recheck the paper-strip test.
If the latch no longer pulls the door tight, the latch part may be worn out. Replace it before you run the stove again.
Testing Your Repair and Running a First Controlled Fire
Keep the stove clean and check the gasket once or twice a year. Regular checks catch small wear before it becomes a larger leak.
Frequently Asked Questions
How can I tell if my wood stove door is leaking air?
Close the door on a strip of paper, such as a dollar bill, and pull it out. Repeat around the entire door perimeter.
What size gasket rope does my wood stove need?
Total Hearth sells 1/4 inch, 3/8 inch, 5/8 inch, and 3/4 inch high-temperature rope gasket by the foot. The listed products are made from black textured fiberglass.
How do you replace a wood stove door gasket?
With the stove cold, remove the old rope and scrape out hardened adhesive from the channel. Clean the channel thoroughly. Apply high-temperature gasket cement in the groove, press the new rope into place without stretching it, and trim the ends so they meet snugly. Let the adhesive cure for about 24 hours before lighting a fire, then run a controlled first fire and recheck the seal with the paper test.
How often should a wood stove door gasket be replaced?
There is no fixed interval, because replacement depends on use, fire intensity and how often the door is opened. Replace the gasket when it is flattened, brittle, frayed, missing sections, or no longer passes the paper test in several spots. Inspect it at the start of each heating season, and check it again if you notice smoke leaking into the room or a fire that burns faster than normal.
